link me!

CT!


Selling at!


Stormlight on FB
oh, the places you'll go!


my PSP homes


Wednesday, December 31, 2014

NOTE: you MAY link to this tut. you MAY print it out for later use offline. you MAY NOT claim it as yours or take anything else from it. this tutorial is ©Ruby/Stormlight, written December 30, 2014.
Supplies needed:
-- PSP
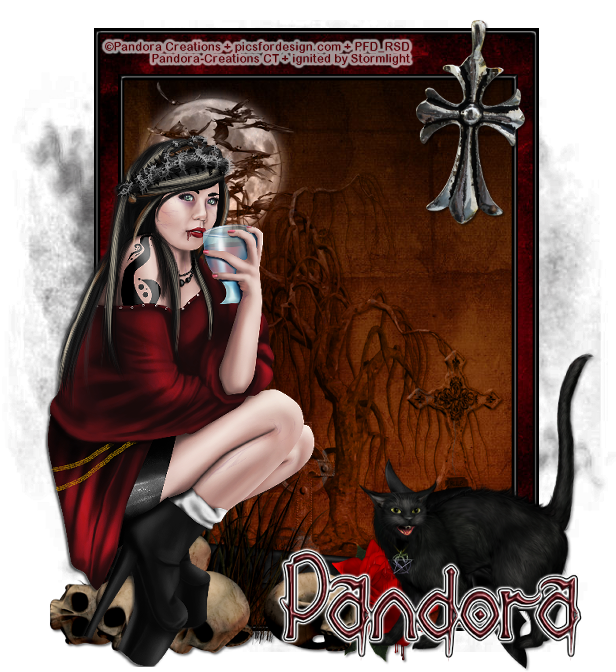
-- main tube of choice. I used Pandora's Francesca.
-- scrap kit of choice (I used the kit Red 2015 by Bibi's Collection.)
-- template of choice. I'm using FB template #9 by Millie. Check out her blog for many great templates, both FB and regular.
-- the plugin Eye Candy Gradient Glow. -- Jazzy's "basic" drop shadow setting of 2, 2, 50, 3 and color black.
-- alpha or font of choice. I am using a Designz by Sue alpha called Beauty.
Tuesday, December 30, 2014

Christmas may be over, but there's still plenty of winter time left. With that in mind, here is a new snag set featuring an older tube of Di Halim's named Cecile and paired with a beautiful wintry scrap kit by Tammy's Welt called First Snow. Cecile is a multi-layered tube with several different clothing and hair options. Tammy's kit is absolutely gorgeous and has everything you need for wintry tag designs.
You can get Cecile here and the kit here. (Both are on sale during S&CO's after Christmas sale, too!)
and grab my set of ten snags here!
Monday, December 15, 2014

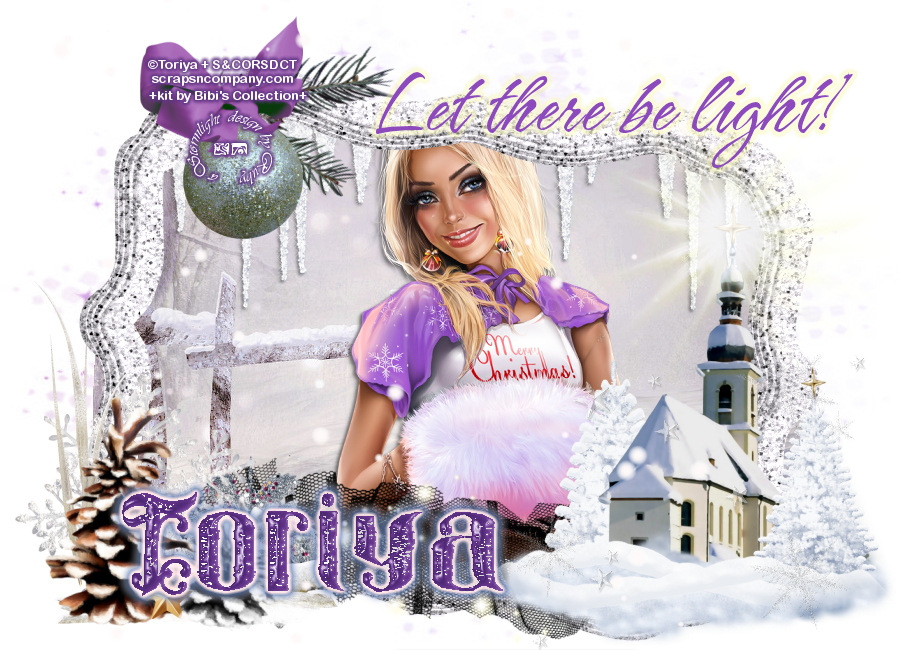
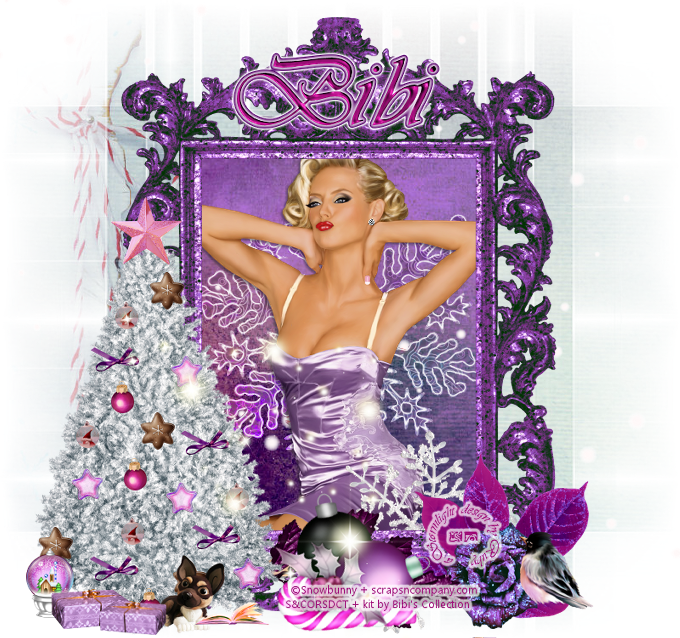
a bit of exciting news--I will now be occasionally making PTU clusters for Bibi's Collection over at S&CO. this is my first set using Bibi's absolutely lovely Christmas kit called "Linda Navidad". it is made to match Linda by Toriya and has a beautiful color palette, as well as a great variety of elements. you can purchase these clusters here.
[for my cluster collectors, do not worry--I will still continue to offer FTU clusters a-plenty to use :) this is just a fun new venture for me.]
below are example tags showing off my clusters, as well as use of the kit:
Saturday, December 13, 2014
NOTE: you MAY link to this tut. you MAY print it out for later use offline. you MAY NOT claim it as yours or take anything else from it. this tutorial is ©Ruby/Stormlight, written December 12, 2014.
Supplies needed:
-- PSP
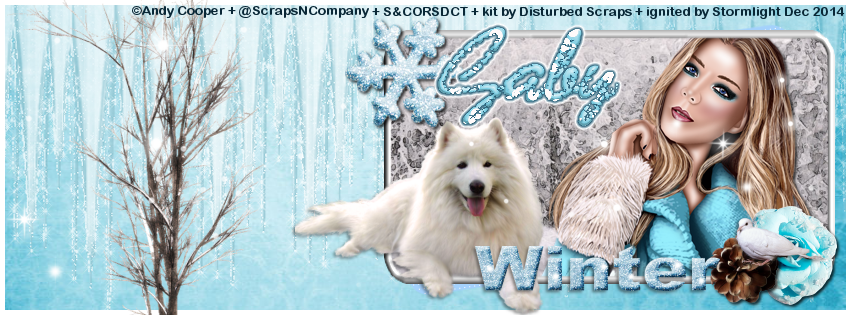
-- main tube of choice. I used Andy Cooper's Sweater Blue, which you can purchase here.
-- scrap kit of choice (I used the made-to-match kit "First Snow" by Disturbed Scraps. you can purchase it here.)
-- template of choice. I am using Timeline template #8 by Millie. You can visit her blog for lots of great templates of all sorts.
-- alpha or font of choice. I used the alpha that came with the kit.
Sunday, November 30, 2014
I have one more cluster for your collecting pleasure tonight! I received another new permission from the lovely Melissa of Melissaz Creationz to create goodies from her fabulous kits. today's cluster was made with her great Santa's Express FTU kit that is part of the O'Scrap Blog Train. you can get the kit here.
and don't forget to check out Melissa's blog for lots of other great kits, templates, and fun items to play with!
and don't forget to check out Melissa's blog for lots of other great kits, templates, and fun items to play with!
right click to save the cluster below!


for you cluster piggies, I have a new set today! I received recent permission from Kandii Popz to create goodies from her awesome kits. so I am starting off with a pair of clusters made from her lovely retired kit "Christmas Waiting". don't forget to check out Kandii's blog, full of great stuff like tutorials, kits, and more!
here are example tags showing off the clusters, as well as the use of the kit:

and you can snag my cluster set here!
Saturday, November 29, 2014
NOTE: you MAY link to this tut. you MAY print it out for later use offline. you MAY NOT claim it as yours or take anything else from it. this tutorial is ©Ruby/Stormlight, written November 29, 2014.
Supplies needed:
-- PSP
-- main tube of choice. (I used Pandora's anime-style girl Carolyna. You can purchase her at S&CO here.)
-- textures of choice. I used two textures by Vix; you can check out her texture packs at her blog. You can also find lots of different textures at DeviantArt.
-- mask of choice. I used a mask also made by Vix. check out all her masks at her site.
-- font of choice. I used HucklebuckJF.
Now, let's create!
Wednesday, November 26, 2014
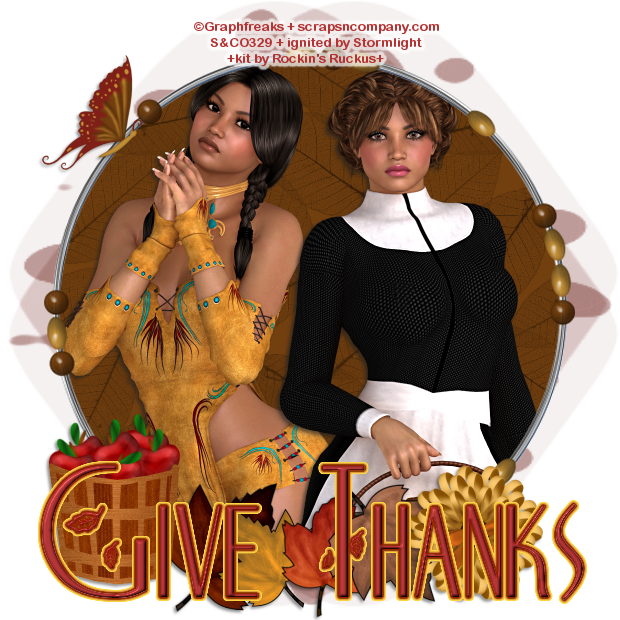
A very happy Thanksgiving to my fellow Americans tomorrow--and for all my fans and followers, I am thankful for your follows, FB likes and the fact that you enjoy the graphics and designs I can share with you. Thus, today's snag set uses Graphfreaks' lovely Native American maiden Takenya. She comes with a bonus Pilgrim girl named Alice Mullins, so you get two Graphfreaks girls for the price of one. I have paired them with an FTU kit by Rockin's Ruckus called "Give Thanks".
You can purchase the Takenya and Alice pack at S&CO.
and grab my snags (10 total) here!
Monday, November 24, 2014
Last week marked the first anniversary for Scraps N Company! Right now they have TWO absolutely wonderful Anniversary Collabs up for grabbing. If you spent a total of $10 on anything in the store, you can choose one of the collabs as a FREE gift. And each collab is PACKED with tons of great goodies, including tubes, scrap kits, alphas and even some CU items!
Below are some tags designed with materials from Collab #2, which you can grab here (or if you're interested in Collab #1, you can find it here.)
Below are some tags designed with materials from Collab #2, which you can grab here (or if you're interested in Collab #1, you can find it here.)

Anniversary Girl
[tube by Tammy's Welt, scrap kit by Mariel Design, template by KanDee]
[tube by Tammy's Welt, scrap kit by Mariel Design, template by KanDee]

Glam Star
[tube by Di Halim, scrap kit by ChaChaz Creationz]

The Birthday Girl
[tube by Danny Lee, scrap kit by Kai Kreations, alpha by Sue]
[tube by Danny Lee, scrap kit by Kai Kreations, alpha by Sue]
Wednesday, November 19, 2014
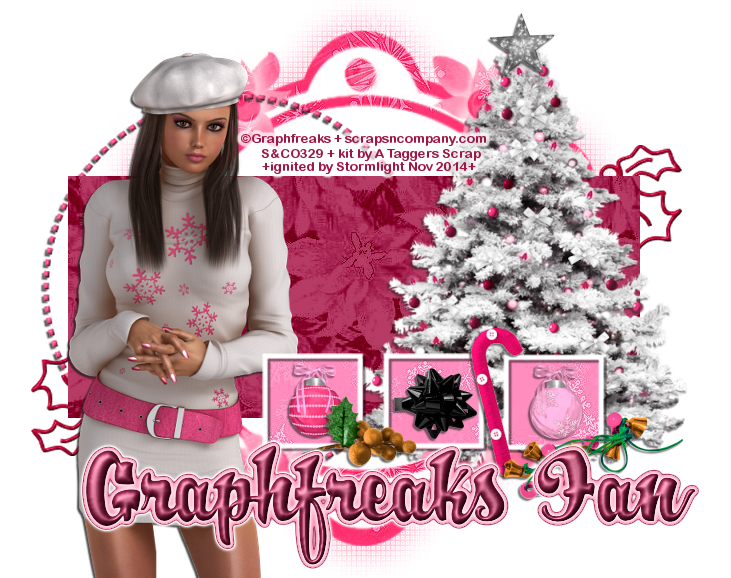
It's beginning to feel a little like Christmas--and Christmas is Stormlight's favorite holiday, so I'm getting a slightly early start with this new Graphfreaks snag set. Candice is a lovely GF girl who works for winter OR Christmas with her snowflake patterned sweater-dress. I paired her with a retired kit by A Taggers Scrap from SATC but she will go well with any winter or Christmas kit.
You can purchase Candice at S&CO.
and grab the snags (10 total) here!
Wednesday, November 12, 2014
NOTE: you MAY link to this tut. you MAY print it out for later use offline. you MAY NOT claim it as yours or take anything else from it. this tutorial is ©Ruby/Stormlight, written November 12, 2014.
Supplies needed:
-- PSP
-- main tube or tubes of choice. (I used Pandora's awesome new angels Sariel and Diabla. You can purchase them both at S&CO.)
-- template of choice. I used a great template by Punky.
-- textures of choice. I am using one texture by Vix, one by WuKillahD and two by carlee. You can find lots of different textures at DeviantArt.
-- mask of choice. I used a mask by Insatiable Dreams.
-- the tube "pinwheel bronze" that comes with most versions of PSP.
-- the plugins Mura Meister Copies and EyeCandy Chrome.
-- font of choice. I used Bleeding Cowboys.
Now, let's create!
Sunday, November 9, 2014

Scraps N Company has an absolutely awesome free-with-purchase collab available for a limited time. If you like basic black and white, this is just what you need. It includes the above poser tube by DNScraps (she comes in three lovely poses), a gorgeous tube by Di Halim, and many more items, including word art, CU elements and beautiful scrap kits, like the one featured above ("Wonderland" by Kissing Kate is a great B&W Alice-themed kit).
You can get the collab HERE. Just spend $10 on ANYTHING (sales included!) and you get the B&W collab FREE.
Sunday, November 2, 2014

NOTE: you MAY link to this tut. you MAY print it out for later use offline. you MAY NOT claim it as yours or take anything else from it. this tutorial is ©Ruby/Stormlight, written November 2, 2014.
Supplies needed:
-- PSP
-- main tube or tubes of choice. If using two tubes, make sure at least one of them comes with a close-up layer. (I used Danny Lee's "Archer" and "Peeta, My Love" You can purchase them at S&CO.)
-- scrap kit of choice (I used the made-to-match kit "Peeta My Love" by Kizzed by Kelz. you can purchase it here.)
-- font of choice. I used WaterBrush ROB.
Saturday, November 1, 2014

NOTE: you MAY
link to this tut. you MAY print it out for later use offline. you MAY NOT claim
it as yours or take anything else from it. this tutorial is ©Ruby/Stormlight,
written October 31, 2014.
Supplies needed:
-- PSP
-- main tube of choice (I used Di Halim's precious Baby Witch. You can purchase her at S&CO.)
-- scrap kit of choice (I used the made-to-match kit of the same name by Bibi. you can purchase it here.)
-- Jazzy's "basic" drop shadow setting of 2, 2, 50, 3 and color black.
-- mask of choice. I used a mask by Ella, which I found at the Creative Misfits blog.
-- font of choice. I used DJ Punkin.
Supplies needed:
-- PSP
-- main tube of choice (I used Di Halim's precious Baby Witch. You can purchase her at S&CO.)
-- scrap kit of choice (I used the made-to-match kit of the same name by Bibi. you can purchase it here.)
-- mask of choice. I used a mask by Ella, which I found at the Creative Misfits blog.
-- font of choice. I used DJ Punkin.
Wednesday, October 29, 2014

NOTE: you MAY link to this tut. you MAY print it out for later use offline. you MAY NOT claim it as yours or take anything else from it. this tutorial is ©Ruby/Stormlight, written October 28, 2014.
Supplies needed:
-- PSP
-- main tube of choice (I used Pandora-Creations' new exclusive "Finding a Star". You can purchase her at Pics for Design.)
-- scrap kit of choice (I used a gorgeous kit by Bibi's Collection called "Boom Boom". this kit is retired but Bibi has tons of other great kits for sale here.)
-- Jazzy's basic drop shadow setting of 2, 2, 50, 3 and color black or white (depending on your tube and kit choices).
-- mask of choice. I used a mask by Kris.
-- font of choice. I used Sloop Script Two.
And now let's create!
Sunday, October 19, 2014
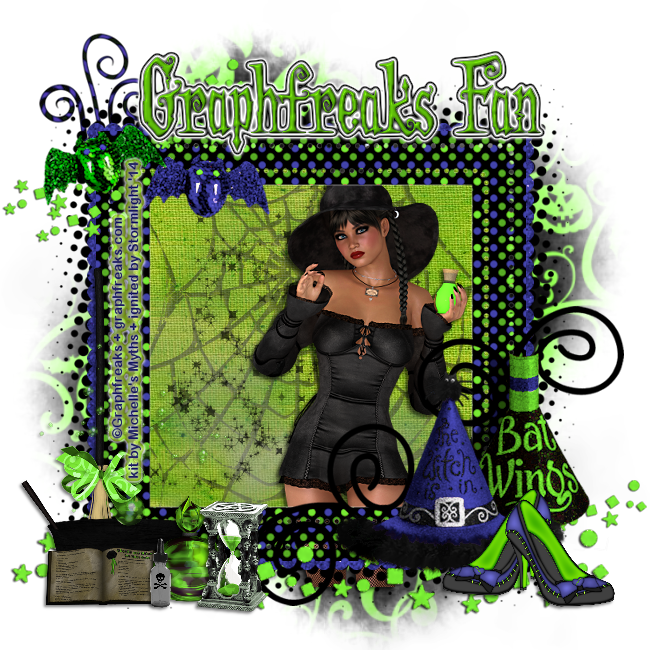
If you're still in Halloween mode, my new snag set is just what you need. This one is made with Graphfreaks' cute witch "Learning to Spell", and a made-to-match kit by Michelle's Myths. Like all my Halloween snags, I've included some
unique wording to give your posts that extra Halloween
spirit.
You can purchase Learning to Spell at the Graphfreaks website and Michelle's kit here.
You can purchase Learning to Spell at the Graphfreaks website and Michelle's kit here.
and grab the snags (10 total) here!
Monday, October 13, 2014

NOTE: you MAY link to this tut. you MAY print it out for later use offline. you MAY NOT claim it as yours or take anything else from it. this tutorial is ©Ruby/Stormlight, written October 12, 2014.
Supplies needed:
-- PSP
-- main tube of choice (I used Ismael Rac's Cute Sweater Revamp. She was a limited bonus tube, but Rac has many other great fall tubes here.)
-- scrap kit of choice (I used a lovely FTU kit by Melissaz Creations called Autumn Bonfire--you can grab it at her blog.)
-- template of choice. (I used a template also made by Melissa. you can download that template pack here.)
-- the plugins Mezzotinto Uno (Visman) and EyeCandy's Gradient Glow.-- Jazzy's "basic" drop shadow setting of 2, 2, 50, 3 and color black.
-- mask of choice. I used a mask by Zuzzanna.
-- fonts of choice. I used GE Signature Script and Vladmir Script.
And now let's create!
Tuesday, September 30, 2014

NOTE: you MAY link to this tut. you MAY print it out for later use offline. you MAY NOT claim it as yours or take anything else from it. this tutorial is ©Ruby/Stormlight, written September 30, 2014.
Supplies needed:
-- PSP
-- main tube of choice (I used Selena by Vi Nina. You can purchase her at S&CO.)
-- scrap kit of choice (I used the made-to-match kit "Hallowitch" by Lizquis Scraps. you can purchase it here.)
-- template of choice. I used template #273 by Missy.
-- the plugins Tramages Moving Screen and EyeCandy Gradient Glow.-- Jazzy's "basic" drop shadow setting of 2, 2, 50, 3 and color black.
-- mask of choice. I used a mask by Kris.
-- font of choice. I used Cauldron Medium.
And now let's create!
Sunday, September 28, 2014
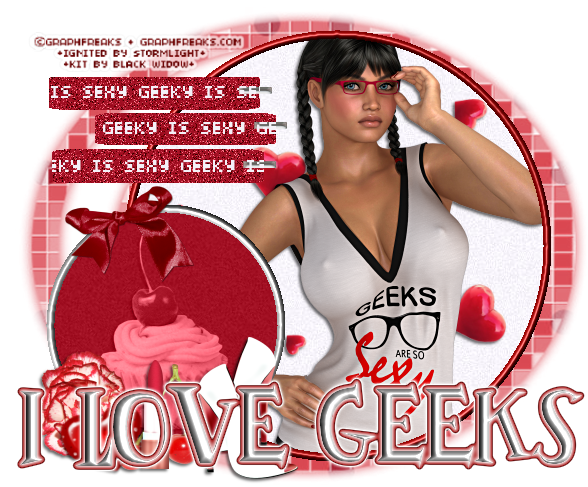
If you're a geek girl like me (or you just love geeks), my new snag set is just what you need. This
new snag set features Graphfreaks' hot Geek Girl and a nice, versatile kit by Black Widow Creationz called "Cherry Toppin".
Geek Girl is available for FREE at the GraphFreaks site and Black Widow's kit is available at their site.
and grab the snags (10 total) here!
Saturday, September 27, 2014
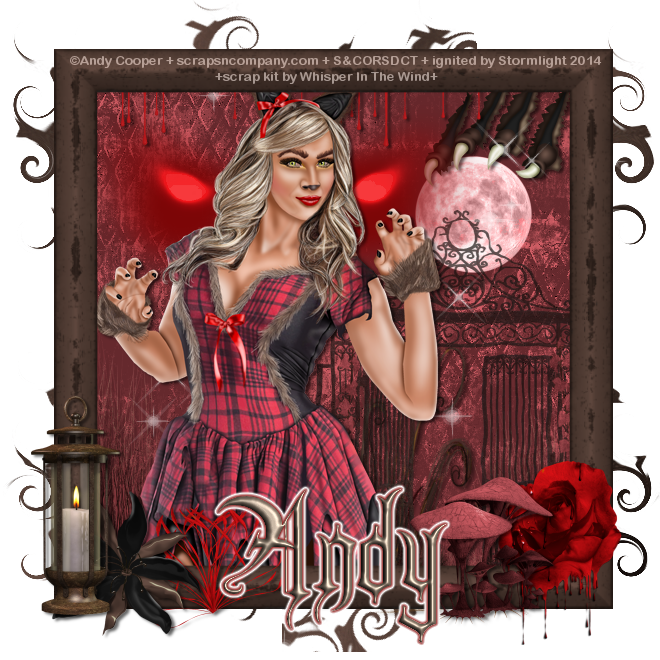
Ready to howl this coming Halloween? ;) If you are, then She-Wolf's Moon is the snag set for you! Made with Andy Cooper's lovely wolf girl and an awesome made-to-match kit by Whisper in the Wind, I've included some unique wording for this set to give your posts some extra Halloween spirit.
grab the snags (12 total) here!
Hiya, Stormlight fans, I'm back again with some more Halloween spirit! This new snag set features Graphfreaks' lovely witch Aurora and a cute kit by Nitwit Collections called "Eeriesistable"
Aurora is available for FREE at the GraphFreaks site and Nitwit's kit is available at their site.
and grab the snags (9 total) here!
Sunday, September 21, 2014

NOTE: you MAY link to this tut. you MAY print it out for later use offline. you MAY NOT claim it as yours or take anything else from it. this tutorial is ©Ruby/Stormlight, written September 21, 2014.
Supplies needed:
-- PSP
-- main tube of choice (I used Carmen by Pandora Creations. You can purchase her at Pics For Design.)
-- scrap kit of choice. I used the made-to-match kit "Naughty Angel" by Disturbed Scraps. You can also purchase this kit at PFD.
-- the plugin EyeCandy Gradient Glow.
-- Jazzy's "basic" drop shadow setting of 2, 2, 50, 3 and color black.
-- alpha or font of choice. I used the alpha that came with the scrap kit.-- Jazzy's "basic" drop shadow setting of 2, 2, 50, 3 and color black.
And now let's create!
Sunday, September 14, 2014

NOTE: you MAY link to this tut. you MAY print it out for later use offline. you MAY NOT claim it as yours or take anything else from it. this tutorial is ©Ruby/Stormlight, written September 14, 2014.
Supplies needed:
-- PSP
-- main tube of choice (I used Grecca by Toriya. You can purchase her at S&CO.)
-- made-to-match scrap kit by Designs by Joan. you can also purchase this collab kit here.
-- the plugins EyeCandy Marble and Gradient Glow.-- Jazzy's "basic" drop shadow setting of 2, 2, 50, 3 and color dark green.
-- font of choice. I used Times New Vespasian.
Now let's create!
Friday, September 12, 2014
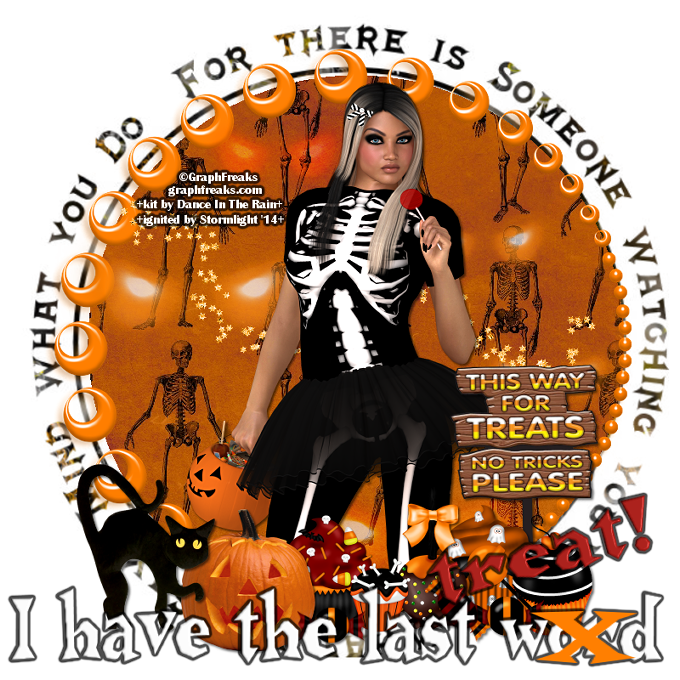
Are you in the Halloween spirit? If you are, this new GraphFreaks snag set is just what you need. Tricks & Treats is a hauntingly cute girl ready to hit the Halloween party circuit and armed with her bucket of goodies. I paired her with a really fun made-to-match kit by Dance In The Rain, which has over a dozen papers and dozens of great elements, including frames, pumpkins, a black scaredy-cat, and (of course) treats ;)
Tricks & Treats is available for purchase at the GraphFreaks site and DITR's matching kit can be found at Lollipops N Gumdrops.
and grab the snags (14 in all) here!
Monday, September 8, 2014

NOTE: you MAY link to this tut. you MAY print it out for later use offline. you MAY NOT claim it as yours or take anything else from it. this tutorial is ©Ruby/Stormlight, written September 7, 2014.
Supplies needed:
-- PSP
-- main tube of choice (I used a lovely new tube by LeEVart.)
-- PSP
-- main tube of choice (I used a lovely new tube by LeEVart.)
-- template of choice. (Millie has tons of great Facebook cover templates. check out her blog for the selection! for this tut, I chose cover template #47)
-- the plugin Tramages.
-- a small tube or two. I used the basic pinwheel bronze that comes with PSP.
-- the plugin Tramages.
-- a small tube or two. I used the basic pinwheel bronze that comes with PSP.
-- Jazzy's "basic" drop shadow setting of 2, 2, 50, 3 and color black.
-- alpha or font of choice. I used a great alpha by Designz by Sue called Capricornia. you can purchase this and tons of Sue's other alphas at S&CO.
-- alpha or font of choice. I used a great alpha by Designz by Sue called Capricornia. you can purchase this and tons of Sue's other alphas at S&CO.
Sunday, September 7, 2014
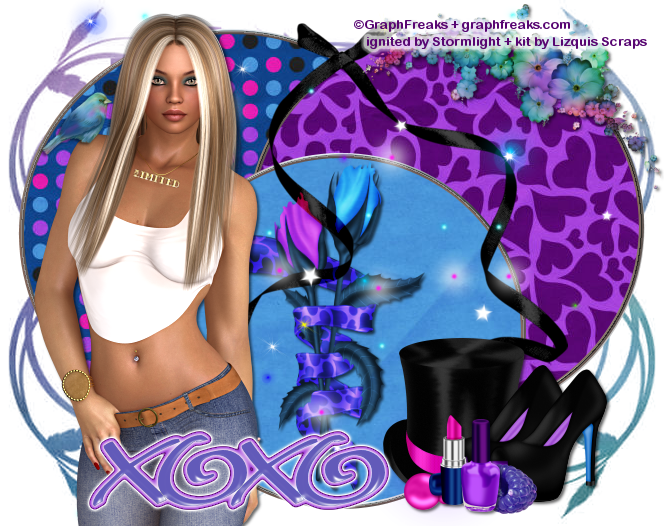
Tonight
I've got a new GraphFreaks snag set for you. Wild Amber uses a beautiful blonde called Limited paired with a great kit by Lizquis Scraps called Amber.
Limited was a special gift and is not available for purchase, but there are many other great posers, both PTU and FTU, at the GraphFreaks website. The Amber kit was retired but you can find out more info where to get Lizquis' many other gorgeous kits at her blog here.
and grab the snag set (12 in all) here!
NOTE: you MAY link to this tut. you MAY print it out for later use offline. you MAY NOT claim it as yours or take anything else from it. this tutorial is ©Ruby/Stormlight, written September 6, 2014.
Supplies needed:
-- PSP
-- main tube of choice (I used Lidia by Pandora Creations. You can purchase her at Pics For Design.)
-- scrap kit of choice. I used a great FTU kit called "Halloween Night" by Seachell.
-- template of choice. I used a template by Designz by Ali.
-- the plugin EyeCandy 4000's Gradient Glow.
-- Jazzy's "basic" drop shadow setting of 2, 2, 50, 3 and color black.
-- mask of choice. I used a mask by Aqua. -- the plugin EyeCandy 4000's Gradient Glow.
-- Jazzy's "basic" drop shadow setting of 2, 2, 50, 3 and color black.
-- font of choice. I used Donree's Claws.
And now let's create!
Thursday, September 4, 2014
NOTE: you MAY link to this tut. you MAY print it out for later use offline. you MAY NOT claim it as yours or take anything else from it. this tutorial is ©Ruby/Stormlight, written August 31, 2014.
Supplies needed:
-- PSP
-- main tube of choice (I used Suniel by Pandora Creations. You can purchase her at S&CO.)
-- template of choice. I used a template by Designz by Ali.
-- textures of choice, at least three. I used textures by devianttales and Aqua.
-- the default gradient "Duotone light blue" (or a gradient of your choice whose colors go with your tube).
-- the plugins Mura Meister Clouds, Visman (Stardust) and Lokas Gel.-- textures of choice, at least three. I used textures by devianttales and Aqua.
-- the default gradient "Duotone light blue" (or a gradient of your choice whose colors go with your tube).
-- Jazzy's "basic" drop shadow setting of 2, 2, 50, 3 and color black.
-- mask of choice. I used a mask by zuzzanna.
-- font of choice. I used A&S Snapper.
And now let's create!
Sunday, August 31, 2014

NOTE: you MAY link to this tut. you MAY print it out for later use offline. you MAY NOT claim it as yours or take anything else from it. this tutorial is ©Ruby/Stormlight, written August 31, 2014.
Supplies needed:
-- PSP
-- main tube of choice (I used Nura by Toriya. You can purchase her at S&CO.)
-- made-to-match scrap kit "Pretty" by Bibi's Collection. you can also purchase this kit here.
-- template of choice. I used a template by Missy. visit her blog to find tons of great goodies.
-- the plugin Lokas Aqua.-- template of choice. I used a template by Missy. visit her blog to find tons of great goodies.
-- Jazzy's "basic" drop shadow setting of 2, 2, 50, 3 and color black.
-- mask of choice. I used a mask by Jenny.
-- font of choice. I used HucklebuckJF.
Now let's create!
Monday, August 25, 2014

NOTE: you MAY link to this tut. you MAY print it out for later use offline. you MAY NOT claim it as yours or take anything else from it. this tutorial is ©Ruby/Stormlight, written August 25, 2014.
Supplies needed:
-- PSP
-- main tube of choice (I used Fairy by Pandora Creations. You can purchase her at S&CO.)
-- made-to-match scrap kit "Fairy Dream" by Bibi's Collection. you can also purchase this kit here.
-- the plugins MuRa Meister Copies.-- Jazzy's "basic" drop shadow setting of 2, 2, 50, 3 and color black.
-- font of choice. I used Rothenburg Decorative Normal.
**"Sidhe Briongloid" is Gaelic for "Faery Dream".
Tuesday, August 19, 2014
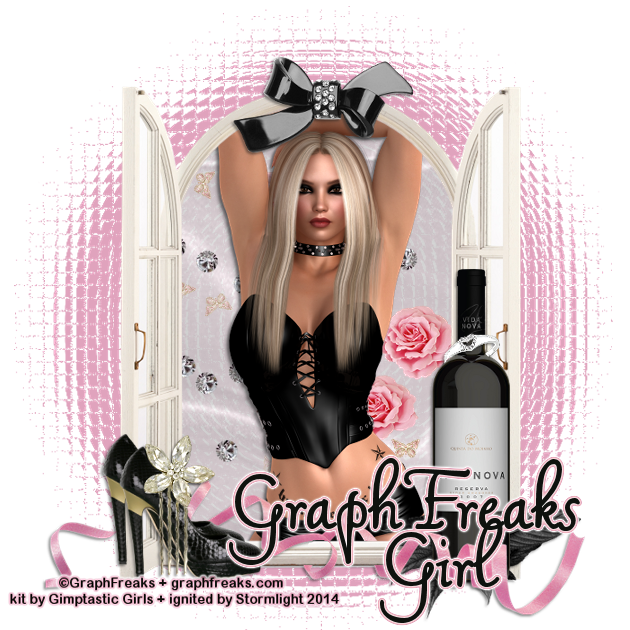
Tonight
I've got another new GraphFreaks snag set for you. This one is for those of you who like your tags a little sexy. Kate is a hot blonde in leather and I've paired her with a great FTU kit from the Gimptastic
Girls called Sweet Seduction.
Kate is FREE to use and is available to download at the GraphFreaks site.
and grab the snags (14 in all) here!
Sunday, August 17, 2014

for
my faithful cluster collectors, I have a new one for you today! the lovely ladies of Gimptastic Tuts gave me permission back in February to do clusters from their FTU kits. took my muse awhile to pick the first one, but she finally chose their gorgeous tropical kit Hibiscus, which you can grab here!
and right click on the cluster to download it!
Saturday, August 16, 2014
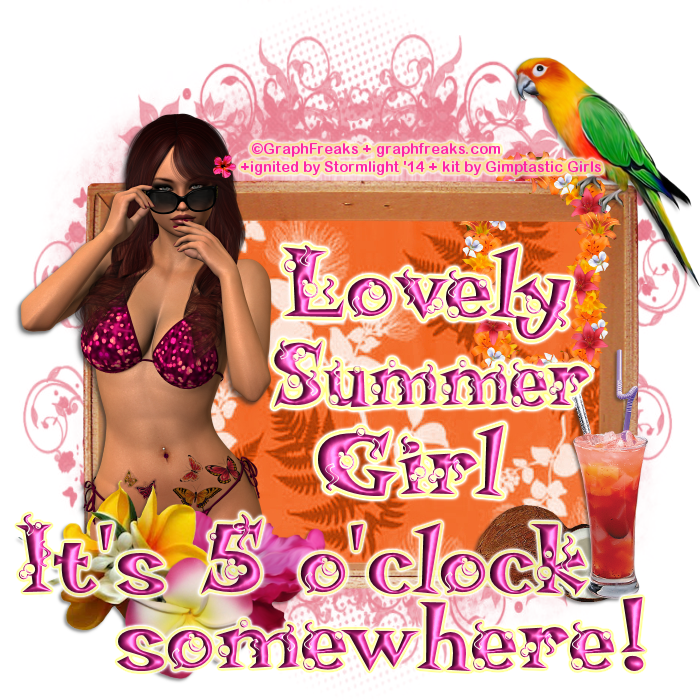
Hello, Stormlight fans! Sorry I have been away so long--the muse has been either uncooperative or AWOL. But she showed up this weekend, so tonight
I have a new GraphFreaks snag set for you.
Sparkles is a lovely summer girl ready for those last days on the beach (or anywhere else!) I paired her with a great FTU kit from the Gimptastic Girls called Hibiscus.
Sparkles is available for purchase at the GraphFreaks site.
and grab the snags (14 in all) here!
Monday, June 23, 2014

Supplies needed:
-- PSP
-- main tube of choice (I used Pandora's Princess, available at S&CO.)
-- scrap kit of choice (I used the made-to-match kit by Bibi, part of the Princess Collab set, also available at S&CO.)
-- the plugin EyeCandy 4000 (Glass and Gradient Glow).
-- Jazzy's "basic" drop shadow setting of 2, 2, 50, 3 and color white.
-- font of choice. I used Vivaldi.
-- font of choice. I used Vivaldi.
Sunday, June 8, 2014

today, I have a new set of quick pages--three in all. these were made from the Wicked Princess kit "For the Love of Jewel", which Wicked Princess made in memory of her beloved grandmother. It is a phenomenally beautiful kit, with soft shades of pink and purple, tons of nature elements and even some vintage-style ones; lots to work with.
you can purchase this kit here.
and you can grab the quick pages HERE!
Wednesday, June 4, 2014

NOTE: you MAY link to this tut. you MAY print it out for later use offline. you MAY NOT claim it as yours or take anything else from it. this tutorial is ©Ruby/Stormlight, written June 4, 2014.
Supplies needed:
-- PSP
-- main tube of choice (I used Kate by Tunchy Art, available at S&CO.)
-- scrap kit of choice (I used the made-to-match kit by Disturbed Scraps, also available at S&CO.)
-- mask of choice (I used a mask by Kris.)
-- the plugin EyeCandy (Bevel Boss)
-- Jazzy's "basic" drop shadow setting of 2, 2, 50, 3 and color black.
-- font of choice. I used Lyonesse.
-- font of choice. I used Lyonesse.
Now let's create!
Subscribe to:
Posts
(Atom)
CU licenses


