link me!

CT!


Selling at!


Stormlight on FB
oh, the places you'll go!


my PSP homes


Saturday, November 29, 2014
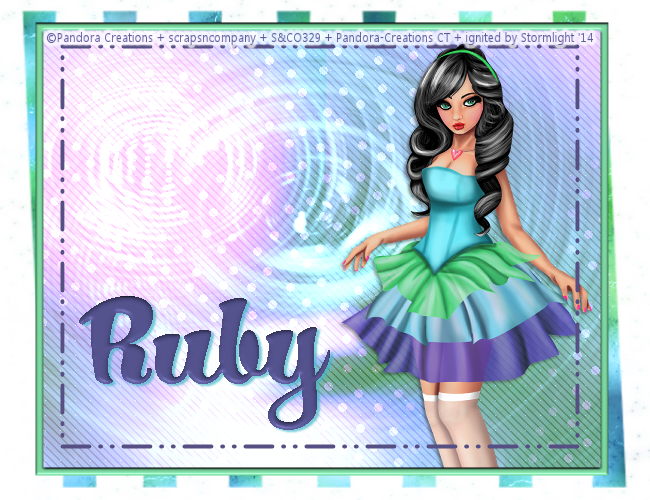
NOTE: you MAY link to this tut. you MAY print it out for later use offline. you MAY NOT claim it as yours or take anything else from it. this tutorial is ©Ruby/Stormlight, written November 29, 2014.
Supplies needed:
-- PSP
-- main tube of choice. (I used Pandora's anime-style girl Carolyna. You can purchase her at S&CO here.)
-- textures of choice. I used two textures by Vix; you can check out her texture packs at her blog. You can also find lots of different textures at DeviantArt.
-- mask of choice. I used a mask also made by Vix. check out all her masks at her site.
-- font of choice. I used HucklebuckJF.
Now, let's create!
1. Open a new canvas, 650x500. Floodfill with white.
2. Paste in your tube as a new layer. Apply Jazzy's drop shadow to it.
3. Select a color from your tube as the foreground/stroke color and make sure the background/fill color is turned off (transparent). Using your rectangle tool, set the line width to 8 and draw a rectangle that takes up most of the canvas. Convert the layer to raster. Go to effects > 3D effects > inner bevel and apply the following settings:

4. Choose another color from your tube. Change the line style to dash-dot-dot and lower the line width to 4. Draw a second rectangle inside the first. Convert to raster.
5. Open your textures. [optional - colorize them to match colors from your tube.] Paste one texture as your bottom layer (above the white) and the second underneath the rectangle frame. Click outside the rectangle frame with your magic wand. Selections > expand > expand by 4, return to the second texture and hit delete. Also hit delete on your tube layer if any of your tube is visible outside the rectangle frame.
6. Apply your mask to the first texture. Merge group.
7. Create a new raster layer. Type your name and position it to your liking. Use the bevel setting from step 3 on your name, but change the angle to 83. Apply Jazzy's drop shadow, but change the color to a contrasting color from your tube.
8. Create a new layer for your copyright/watermark and add it on.
Subscribe to:
Post Comments
(Atom)
CU licenses


0 comments:
Post a Comment