link me!

CT!


Selling at!


Stormlight on FB
oh, the places you'll go!


my PSP homes


Wednesday, January 17, 2018
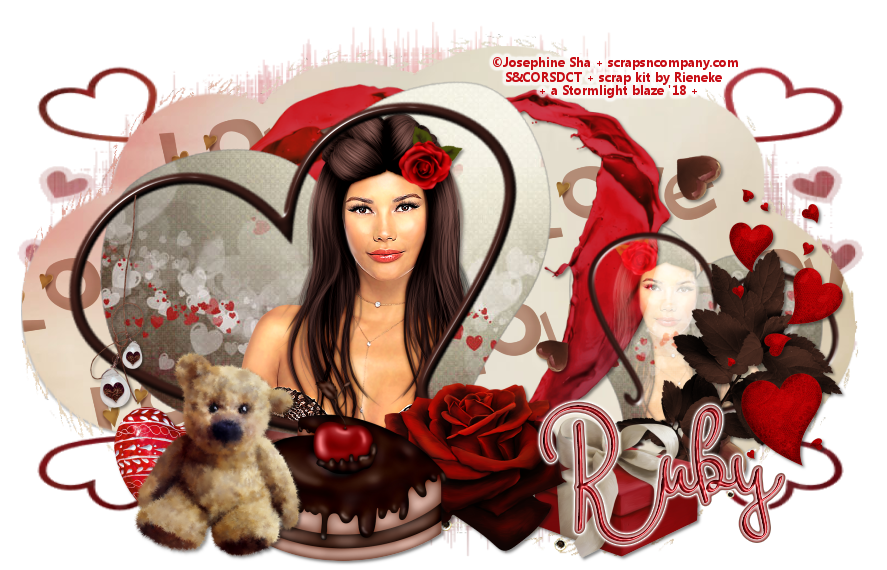
Supplies needed:
-- PSP
-- main tube of choice that is large or has a closeup layer. I am using "Valentina" by Josephine Sha. You can purchase her here.
-- scrap kit of choice with scenic papers included. I am using a matching kit by Rieneke, which you can get here.
-- template of choice. I am using a template by Ali.
-- mask of choice. I am using a mask by Simone.
-- the plugins Visman and Eye Candy.
-- font of choice. I am using Mikaela Script.
1. Open your template, duplicate and close the original. Save copy as your new canvas. Delete any creator/copyright layer.
2. Select three papers from your kit and paste them onto canvas. Drop one to the bottom layer and hide for now. Place the second above the large heart on the left and resize or position the section of paper you want to show. Select the heart shape layer. Select all > float > defloat > invert and hit delete key on the paper. Repeat this step with the same paper on the smaller heart on the right.
3. Move your second paper above the cloud shape. Select all > float > defloat > invert and hit delete key on the paper.
4. Duplicate the cloud paper. In your plugins menu go to VM Distortion > Radial Pox and apply these settings:

5. Paste in your tube and resize as needed. Apply basic drop shadow and move tube layer below large heart frame. Use freehand tool to cut away excess tube outside frame.
6. Duplicate this layer. Resize copy by 70% and mirror, then repeat latter half of step 5. Change blend mode to screen.
7. Return to your heart frames. Use the manual color correction tool to change the color of each frame to a dark color from your tube or kit. In plugins menu, go to Eye Candy > Bevel Boss and apply the Picture Frame preset to each frame (make sure to change bevel placement to "inside marquee")
8. Unhide bottom paper and apply mask, then merge group in your layer palette.
9. Now let's add some elements. Numbers/names apply to the scrap kit I'm using so if you're using a different one, use the elements of your choice. All elements are resized with the smart size setting. Any directions for placement of elements are optional - you can follow my placements or place where preferred. Remember to apply basic drop shadow after each element is placed unless otherwise marked:
11 (shoes) - 40%.
23 (rose) - 40%.
44 (leaves) - 35%.
5 (verticle cluster of hearts) - 55%.
4 (paint splotch) - 85%. drop below framed hearts layers.
22 (teddy) - 50%.
15 (cake) - 40%.
46 (gift) - 30%.
28 (carved heart) - 25%.
42 (string hearts) - 45%.
40 (heart scatter) - 90%. drop just above paint splotch layer.
32 (scatter) - NO drop shadow.
10. [optional] Open the "LOVE" word art from the kit and recolor. Duplicate several times and place copies at random scattered across the canvas. Return to your cloud shape layer and select all > float > defloat > invert. Select word art layer again and hit delete key. Move this layer to just above cloud paper layer. Change blend mode to multiply.
11. Create a new raster layer for your name. Type your name and position to your liking. In effects menu, go to Inner Bevel and apply these settings:

12. Go to Eye Candy Gradient Glow and apply these settings:

13. Create a new layer for your copyright/watermark and add it on.
Subscribe to:
Post Comments
(Atom)
CU licenses


0 comments:
Post a Comment