link me!

CT!


Selling at!


Stormlight on FB
oh, the places you'll go!


my PSP homes


Sunday, February 16, 2014

NOTE: you MAY link to this tut. you MAY print it out for later use offline. you MAY NOT claim it as yours or take anything else from it. this tutorial is ©Ruby/Stormlight, written February 14, 2014.
Supplies needed:
-- PSP
-- main tube of choice (I used Pandora's cute chibi "Lovecita")
-- template of choice. (Millie has tons of great Facebook cover templates. check out her blog for the selection! for this tut, I chose cover template #6)
-- butterfly tube or tubes of choice.
-- twinkle tube of choice.
-- [optional] heart slats, brush or tube of choice.
-- the plugins EyeCandy 4000 (Bevel Boss) and MuRa Meister Copies.
-- butterfly tube or tubes of choice.
-- twinkle tube of choice.
-- [optional] heart slats, brush or tube of choice.
-- the plugins EyeCandy 4000 (Bevel Boss) and MuRa Meister Copies.
-- Jazzy's "basic" drop shadow setting of 2, 2, 50, 3 and color black.
-- font of choice. I used Virgin Regular.
[note: there are lots of safe, free to use slats, and butterfly and twinkle tubes around the Internet, but if you have trouble finding them, you can download this little supply file.]
-- font of choice. I used Virgin Regular.
[note: there are lots of safe, free to use slats, and butterfly and twinkle tubes around the Internet, but if you have trouble finding them, you can download this little supply file.]
Cover:
1. Open template, duplicate, close original and save this as your new canvas. Delete word art layers and corner star layers unless you want to use them in your design.
2. Click on layer
4 (center rectangle), floodfill with a color choice from tube.
3. [skip this step if not using the heart slats/tube/brush] - Copy
heart slats file, paste onto your canvas. Move it to left hand side, resize to 50% smart size. With your magic wand, select every other slat. Floodfill these slats white, then go to your layer palette and change
layer blend mode to hard light, opacity 49%.
4. Click on layer
1 (rectangles), choose a color from your tube and floodfill every other
rectangle. Then choose a similar color from your tube and
floodfill the opposite rectangles.
5. Click on layer 3 -
floodfill with a contrasting color from tube.
In your plugins menu, go to EyeCandy 4000 > Bevel Boss > Carve with Lip and use the default settings.
6. Paste tube as
top layer and duplicate. Apply Jazzy's basic drop shadow to each copy, then hide copy. Move
visible tube to right hand side of cover. Resize
to 45% bicubic if your tube is large like mine. Click outside of layer
4 with your magic wand, and hit the delete key.
7. Unhide second
copy of tube. Position in the center to
your liking, then resize if needed (I resized 70% bicubic).
Repeat the latter half of the previous step. In your layer
palette, change the blend layer to exclusion and opacity to 38%.
8. Open your
butterfly tubes. Place one on the heart
slats, resizing if needed. Apply a basic drop shadow.
9. Choose
another (one that is in "flight") and paste it in the center, resize if needed to make it small. In your plugins menu, apply Mura Meister > Copies and from the present menu, select Wave - Horizontal and use its default
settings. Move your wave of butterflies down
so it is running along the bottom third of your cover.
10. Paste in the twinkle tube and place where you like. Make two copies and place them
in other random spots to your preference.
11. Click on template's background
layer, and go to Adjust > Add/Remove Noise > Add Noise with the settings 33%, random, monochrome UNchecked. Repeat on
the border layer but increase the noise to 63%.
12.
Create new raster layer for your copyright/watermark. Use small font,
such as Arial Narrow at 11 point.
13. Create another new raster layer for your name. Type in your name and place it along the lower half of your canvas. (Make sure your name doesn't go anywhere near the black square that is marked where your profile photo will go!)
14. Delete the black square that marks the profile photo placement. Save as png.
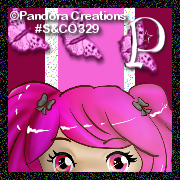
Profile Photo:
1. Open a new canvas, 180x180. Copy background and
stripes layers from the cover, paste into canvas.
2. Paste a new copy of tube into canvas. You can resize and position how you like.
2. Paste a new copy of tube into canvas. You can resize and position how you like.
3. Copy and paste your string of
butterflies, position how you like.
4. Create new raster layer, floodfill black. Selections > modify > contract by 8, hit delete. Apply latter half of step 11 to this layer.
4. Create new raster layer, floodfill black. Selections > modify > contract by 8, hit delete. Apply latter half of step 11 to this layer.
5. Repeat steps 12 and 13 from the cover directions for your initial and copyright.
Subscribe to:
Post Comments
(Atom)
CU licenses


0 comments:
Post a Comment