link me!

CT!


Selling at!


Stormlight on FB
oh, the places you'll go!


my PSP homes


Monday, August 25, 2014

NOTE: you MAY link to this tut. you MAY print it out for later use offline. you MAY NOT claim it as yours or take anything else from it. this tutorial is ©Ruby/Stormlight, written August 25, 2014.
Supplies needed:
-- PSP
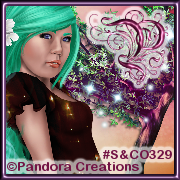
-- main tube of choice (I used Fairy by Pandora Creations. You can purchase her at S&CO.)
-- made-to-match scrap kit "Fairy Dream" by Bibi's Collection. you can also purchase this kit here.
-- the plugins MuRa Meister Copies.-- Jazzy's "basic" drop shadow setting of 2, 2, 50, 3 and color black.
-- font of choice. I used Rothenburg Decorative Normal.
**"Sidhe Briongloid" is Gaelic for "Faery Dream".
Banner:
1. Open a new canvas, 600x250. Choose a scenic or decorative paper (I chose Paper2) and paste it into your canvas. Drag or resize to show the area/colors you wish to show. (I resized mine 75% and moved it to display the castle on the lefthand side)
2. Choose a smallish element (I chose Element73 - the bluish leaves). Resize as needed (I resized 15%). In your plugins menu, go to MuRa Meister > Copies and choose Line from the preset menu. Drag your element line down to the bottom of the canvas.
3. Paste your tube into your canvas. Resize if needed (I resized mine 25% bicubic). Position tube on the right hand side. Apply Jazzy's basic drop shadow.
4. Paste in a decorative scatter/sparkle (I chose Element84 - the heart scatter). Position to your liking and change the blend mode to Luminance.
5. Let's jazz up your banner with some elements. Numbers apply to the scrap kit I'm using so if you're using a different one, use the elements of your choice. All elements are resized with the smart size setting. Remember to apply Jazzy's basic drop shadow after each element is placed unless otherwise marked:
8 (purple leaves) - 40%. Drop below the faery tube and position so that the leaves are visible behind her.
92 (bird) - 20%. Place on faery's knee.
54 (green grass) - 30%. Drop below the leaves line and position at lower left.
34 (fawn) - 25%. Place on patch of grass at lower left.
15 (bunny) - 20%. Place just in front of fawn.
19 (sparkle trail) - Place to your preference. NO drop shadow.
6. Create a new raster layer for your name. Type your name and position it to your liking. Go to effects > 3D effects > inner bevel and apply the following settings:

7. In your plugins menu, go to EyeCandy 4000 > Gradient Glow and apply the following settings:

8. Create a new layer for your copyright/watermark and add it on. Use a small font, such as Arial Narrow at 9/10 point. Repeat the previous step if needed to make your copyright visible.
Avatar:
1. Create new canvas - size 180x180.
2. Paste in your paper from banner or a new paper of choice (I chose Paper7). Resize your paper to 30% and/or drag to show the area/colors you wish to show.
3. Paste in your main tube layer. Position to your liking.
4. Choose a tall element from your kit and paste into your canvas (I chose Element80 - the purple-flocked tree). Resize if needed--I resized to 40%. Drop below your tube layer.
5. Copy the sparkle element layer from your banner and paste into your canvas. Position so that the sparkles are layered over the tree's branches/your nature element.
6. Create new raster layer. Click it with your magic wand and floodfill with a dark color from your tube or kit. Go to selections > modify > contract > contract by 6. Hit your delete key.
7. Apply step 6 from banner directions to give the border a bevel.
8. Repeat steps 6-8 from the banner directions for your initial and copyright/watermark layers.
Subscribe to:
Post Comments
(Atom)
CU licenses


0 comments:
Post a Comment