link me!

CT!


Selling at!


Stormlight on FB
oh, the places you'll go!


my PSP homes


Sunday, October 27, 2013
NOTE: you MAY link to this tut. you MAY print it out for
later use offline. you MAY NOT claim it as yours or take anything else from it.
this tutorial is ©Ruby/Stormlight, written October 27, 2013.
Supplies needed:
-- PSP
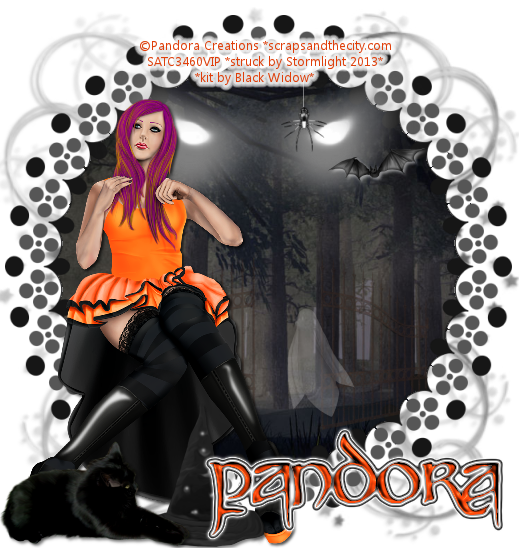
-- main tube of choice (I used Pandora Creations' Niky Halloween--you can get her at Scraps and the City.)
-- made-to-match scrap kit by Black Widow Designz. you can also purchase this kit at SATC here.
-- Jazzy's "basic" drop shadow setting of 2, 2, 50, 3 and color black.
-- the "light" version of Jazzy's "basic" drop shadow (same settings as above, but change the color to white).
-- mask of choice. i used a mask by Brutal Designs.
-- font of choice. I used Party Business.
1. Open element 30 of the scrap kit (the circular frame), duplicate,
close original. Resize 80% smart size.
2. Open scenery paper of choice. Paste in, resize 70-80%, move if desired to
show specific area of scenery.
3. Select outside frame with your magic wand. Selections > modify > expand by 2, then hit your delete button (do not invert).
4. Paste in your tube. Resize as needed (for this tube, I resized
40% bicubic). Place on left hand
side. Apply Jazzy's basic drop shadow.
5. Now it's element time! All elements are resized with the smart size
setting. Remember to apply basic drop shadow after each element is
placed, unless otherwise indicated:
27 (bat) - 20%, light drop shadow.
26 (eyes) - 75%, NO drop shadow.
19 (gates) - 70%, NO drop shadow. In your layer palette, lower the opacity to 46.
23 (kitty) - 40%. place him at your tube's feet.
24 (ghost) - 20%, in your layer palette, lower the opacity to 22.
25 (spider) - 20%, NO drop shadow. Place near the top of the frame.
22 (hat) - 60%, move under kitty layer. Place hat next to kitty so his paws are
resting on the brim.
6. Create a new raster layer. Use paintbrush to draw a thin
line from top of frame to spider. In your layer palette, lower
opacity to 42.
7. Create a second new raster layer and floodfill with a color from your scenery
paper. Apply Mura Meister Copies monochrome 1
default settings. Apply your mask of choice,
merge group, and move this layer to the bottom.
8. Create a new raster layer for your name. Add your name. Go to effects > 3D effects > inner bevel and apply the following settings:

9. Go to your plugins menu and apply EyeCandy's Gradient Glow with the following settings:

10. Create new raster layer for your copyright/watermark and add it in.
Subscribe to:
Post Comments
(Atom)
CU licenses


0 comments:
Post a Comment